Disclaimer: I am not a consultant (never have been). I don’t have a family member working for them. I have no financial interest. Every wrap featured has been earned – either I paid for it or I earned it as a hostess for a party.
(EDIT: 11/21/2014 – I decided to be a consultant because I need the discount for my habit. However, you won’t find me posting my info on my blog. I intend to continue to be honest. Also, don’t buy the vitamins. Just. Don’t. Seriously. Go buy some cheap ones at Wal-Mart and then use the rest of that money to buy more wraps
EDIT 2: 3/6/2015 – I decided to resign being a consultant. I still think they’re an excellent company but I just don’t have time and plus, I miss my old consultant! Sometimes we just don’t have the time for these things).
I’m going to explain how I discovered Jamberry wraps and why I fell in love, then I’m going to move onto my process ending with some tips and tricks for both putting on and removing. If you want to skip the beginning part just click on the appropriate link:
– My Process
– Tips & Tricks
I don’t do my fingernails. I’m a homemaker – I cloth diaper, I scrub pans, I cook dinner, I clean my childrens’ faces with spit… you see what I mean. Salon nails are for women who don’t have to pry LEGO pieces apart. I’m hard on my hands and therefore hard on my nails. I’m also right handed. This means when I paint my nails, my left hand looks fantastic while my right hand looks like I let my 7 year old paint my nails (and believe me, he’s asked if he can). Worse, within a day I’ll end up with at least one decent chip even if I put on fancy top coats.
I discovered Jamberry nail wraps in the dead of winter in the upper Midwest while we were dealing with the polar vortex that could freeze out the most hardened Minnesotan (which I am not). A friend invited me to her Facebook party and on a whim I bought a couple for my toenails (which I do religiously in the summer). However, it was freezing cold and I was stuck at home with an infant, so on New Year’s Eve, after the baby was in bed and my husband and oldest were partying hard at church (board games can get crazy, let me tell you), I decided to try my first set of wraps.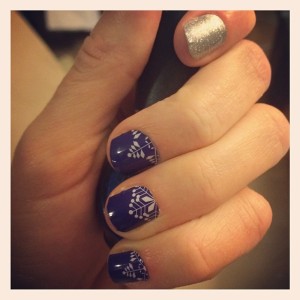
Now, because I purchased them online, I didn’t have the benefit of a consultant showing me how to apply them. I spent at least half an hour watching videos on Jamberry’s website. They’re certainly helpful and thorough even if slow moving. I’d like to say that half an hour later, I had mastered the art of the nail wrap, but it took me a while to get the hang of it and it was less than flawless.
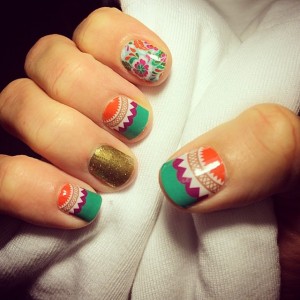
It was a couple months later that I decided to try again with some wraps I purchased when my consultant was cleaning out her inventory. I’d reached out to her for some helpful tips and so I figured I was ready to try again. Husband and I were going to an Imagine Dragons concert and while I’m still carrying my baby weight, I wanted to look hip and haute. 
As you can see, I had much better success with these. Honestly, they also made me a huge fan of the matte versions of the wraps – and a huge fan of the wraps in general. I’m pretty sure this was the moment I fell in love. I knew I was smitten with these things and now I have an entire photo album (one of those brag books you can get for a dollar at Wal-Mart) full of sheets of wraps.
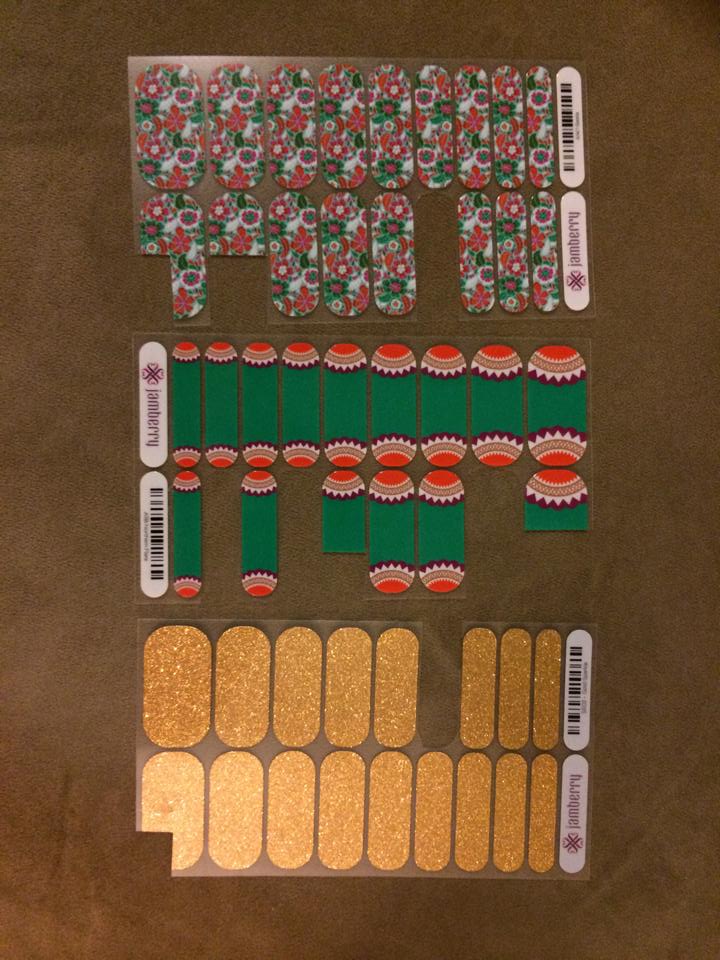
After a full mani/pedi, here’s what I have left.
What I love too is that I can get several manicures out of a single sheet (and since I mix and match, I get even more). Interestingly, I prefer them on my fingers than toes. For future pedicures though, I think I’ll focus on putting the wrap on my big toe and then using a lacquer on my other toes, but that’s because I have weird, curved, big nails. I will say they last forever on my toes. I actually end up taking them off after a few weeks because I’m bored and want to do my nails again!


Here’s a Jamicure from Day 1 to Day 10:


I have found Jamberry a great excuse to pamper myself. I’m not a girly girl by any stretch of the imagination, but these are fun and they can reflect me in a lot of different ways. Being at home with children can leave me feeling frumpy, but I’ve found that wearing them makes me just feel a bit more… me. If nothing else, give them a try – that’s all I did and now I’m hooked!
My Process
1. Clean your nails and push back the cuticles, trimming as needed. Nail prep is so very important. I’ve found that when I don’t take the time to prep carefully, my application isn’t nearly as good.
2. Soak your nails in cooled black tea (buy the cheap stuff). Dry off, clean with alcohol again.
3. Match the wrap to your fingers. They have clear backing so just hold it over the nail and pick the best size. It’s better to go smaller than larger as you don’t want the wrap to adhere to skin or it won’t last.
4. Cut the wrap. Hold in front of the heater (or blow dryer) for the allotted amount of time 3-5 seconds usually (although glitter and glimmer wraps need longer – sometimes up to 10 seconds).
6. Put the wrap on! (Go watch the Jamberry videos for this).
7. Apply more heat, use your cuticle pusher to help adhere the wrap tightly.
8. Avoid soaking and heat for a few hours. So no baths after application!
Tips and Tricks (Updated Periodically)
– Soak your nails in black tea for about a minute to a minute and a half. The time I used it, it was my best application yet. I don’t know why it works. There’s murmurs about things like ph balances but honestly, unless someone shows me a study, I’m going to go with “I don’t know, just because.” That said, it could help because it slows you down.
– Prep. Prep. Prep. Buff and smooth your nails.
– A tip I got from my consultant if you’re struggling to get a good match for your nail size is to take a piece of scotch tape and put it over your nail, trace your cuticle with a pen or marker, then put that on the preferred size and trim the wrap to match the tracing.
– Smooth down and out. Don’t smooth up or you’ll create bubbles at the end of your nail. I often times don’t smooth the end until I’ve trimmed the wrap down to my nail.
– I use a nail clipper to trim my nails. You just have to remember to clean it out after each trim because the wraps get sticky and end up stuck inside your clipper.
– Really take the time to cure those tips. You’ll notice in my picture of Day 10 above one of my nails looks like it’s coming up from the edge, this happens any time I’ve not taken the time to really make sure it’s on there. That said, if you’re like me and you miss a nail (because you’re easily distracted and/or you have children), I’ve found applying just a smidge of top coat to the offending section of the wrap can help stick it back down.
– Use the gentle removal method. Soak your nails in nail polish remover and then use a cotton pad with remover to rub off the wrap. It’ll be a bit messy, but much easier on your nails, particularly if they’ve been on there for some time. The first couple of times I removed with heat that that was okay, but the adhesive is strong and some people can end up with it weakening the nail. When I use the gentle method, my nails are in tip-top shape afterward. I also massage some cuticle oil afterward as well (I buy whatever is at the store, the Jamberry oil is a bit pricey).
– If you get into Jamberry, the heater is totally worth it. ;)
My Nail Combos (updated periodically):
Northern Flare, Siesta, Gold